August 2001

August 1 - We received our first parts from Jorge (Zapco Engineering, Upland, CA) who has been making our custom parts for us. They look awesome.

The part in the upper left is a mounting bracket we got with the Electromotive computer to mount the crank sensor. Unfortunately, it did not fit our timing cover. The part in the lower left was fabricated by Jorge to fit over the protrusion on the timing cover. It fits perfectly.

 
  The part on the right above is a standard fuel filler cap from Cobra Accessories with a sleeve fabricated by Jorge. The standard cap is designed for 1.5" ID fuel filler hose. The sleeve increases the size to work with the 2" ID hose we need to use with our fuel cell.

We also had Jorge fabricate some brackets for our Electromotive computer. These are shown on the left.

August 6 - I was fairly busy with other things this week, so we didn't make too much progress, but Scott was able to finish wiring the sensors on the engine and install the crank position sensor.

We also picked up our headers and sidepipes from Performance Coatings - they look great. It's hard to tell that they are ceramic coated and not chromed.


Unfortunately, one the rear driver's side header interfered with the head stud nut just forward of the header. I had to use a ball-peen hammer to dent the inside of the header a bit to provide adequate clearance. Next time, I'll check the fit beforehand.

The next big problem was with the engine mounts. Richard sent us a pair of heavy-duty mounts designed 

for police cruisers.  These fit the block great, but did not clear the tabs. So, I spent Saturday driving around to find two of the standard mounts, only to discover that these don't clear the beefier Sportsman block.

We've come up with three options to solve the problem. The interference problem with the headers on the heavy duty mounts is caused by the tabs that stick out the side.

 
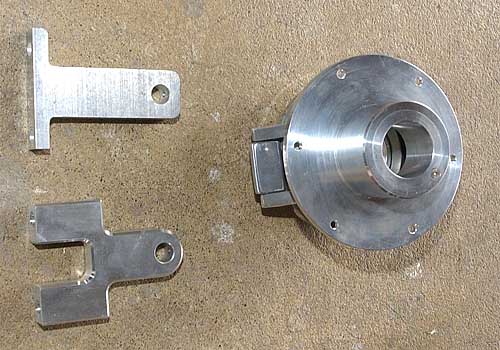
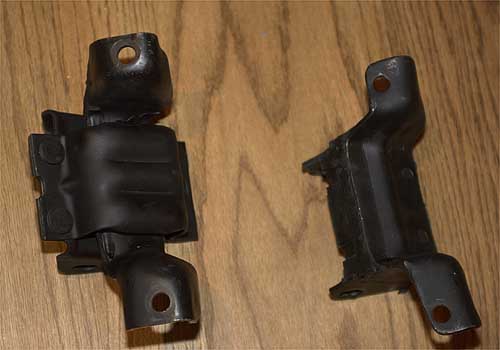
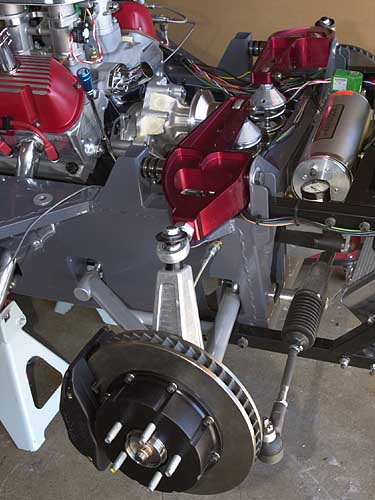
These tabs allow two pieces to be riveted together. We took the mounts to our local welder to have him cut off the tabs and weld the two pieces together. This should buy us about 3/4" of added clearance which may be enough.

Our second option is to expand the upper bolt holes in the regular mounts so that they fit the block. This will modify the position of the mounts relative to the block, but we may have enough play in the mounting tabs which bolt to the lower mounts to compensate.

If both of these options are unsuccessful, we can get hard mounts custom fabrication. The disadvantage to this is that more engine vibration would be passed to the chassis which will make the chassis buzz at certain RPMs and will tend to reduce the reliability of the electronics, so this is only a last resort.

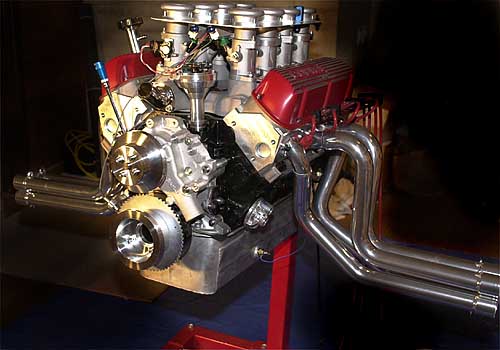
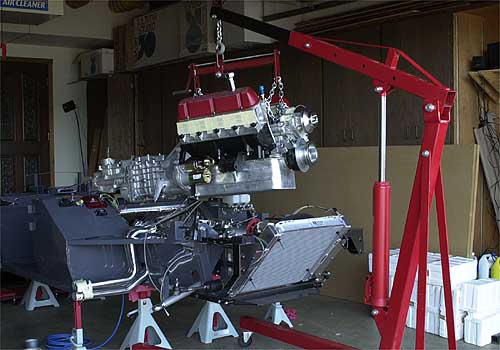
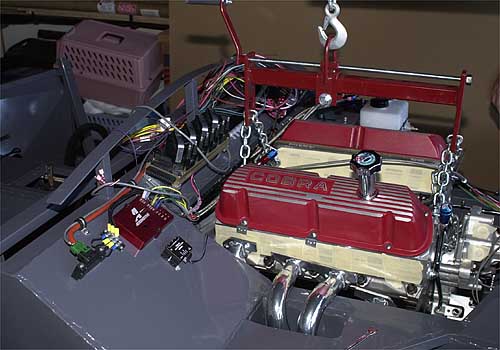
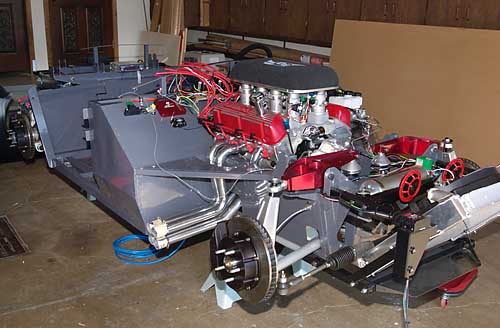
We were all ready to install the engine this past weekend if we hadn't run into the problems with the engine mounts. Hopefully, we'll get past this in the next couple days and have the engine in the car. That will be a key milestone.

August 8 - The heavy duty mounts still don't clear the headers after modification, although they're real close. But we also found that the heavy duty mounts raise the engine about a half inch. While this would be nice for ground clearance, it raises the center of gravity and also decreases our odds that we'll be able to use the smaller hood scoop (which we're still hoping for).


We managed to get the normal engine mounts to fit by enlarging one of the holes a little. This looks like it will work fine.

We also installed Thermo-tec insulation on the firewall to reduce the heat transfer into the passenger compartment. We're hoping to put the engine in tomorrow.

August 9 - A very productive day. The engine is in the car! But I'm getting ahead of myself. First, we had to install the clutch and transmission. After bolting on the flywheel three times (here's why), we installed the clutch, transmission and starter. We used the side table on the table saw to support the tranny while we maneuvered the engine into place. Considering how heavy these things are, they actually went together reasonably well.


Fortunately, we had ordered the correct length bolts since the ones that came in our ARP "complete engine set" were the wrong length.

  We got the engine bay ready to accept the engine by taping all the wires and hoses out of the way, placing the headers in their slots, and moving the jack stands farther back so that we could slide the engine hoist under the front of the car. We also removed the front suspension to provide a little more room. We also had to remove the steering column and shaft in order to insert the headers.
Once we got the engine centered over the engine bay, we realized that the install would go a lot smoother if we had a little more muscle. So we called a couple of friends who came over to give a hand. The front wheels on the engine hoist seem to have an uncanny ability to aim for the jack stands, but we eventually got the engine headed in the right direction.  

  When the engine was almost in, we realized that the radiator was going to block our ability to move the hoist back far enough (next garage will have a ceiling mounted hoist :-). So after a ten minute diversion to pull the radiator, we were off and running again. This engine is a TIGHT fit in the JBL. Scott was under the car guiding the tranny in place while I moved and lowered the hoist. Our friends made sure the headers stayed where they were supposed to.

We got the engine in as far back as it would go, but the transmission mount was still 1/2" ahead of its bolt holes. Then we realized that we could rotate the mount and get it a little closer to the back of the tranny. This solved the problem and allowed us to bolt it in. After rocking the engine a little, we got a bolt through the driver side mount, then lowered the hoist a little more to get the passenger side mount lined up.


We don't have the headers bolted on all the way yet - and in fact may have a bit of work to get one of the headers on the driver side bolted in - but we have friend from out of town coming over for dinner so had to call it quits for the day.

August 31 - We've been on vacation the last couple weeks, so didn't do anything on the car. Scott is now in school (he's attending a boarding school in Hawaii, so don't feel too sorry for him :-)) and I promised him I wouldn't do too much on the car while he was gone. So progress will be slow for a while.

Before we left for vacation, Scott installed the new uprights and rockers from JBL. The new red anodized rockers look really sweet.

 
  Scott also installed the individual manifold air pressure hoses from each of the throttle bodies. These hoses connect to an averaging manifold which connects to the fuel pressure regulator and the MAP sensor for the fuel injection computer. We still need to put hose clamps on each of these hoses.

When all is said and done, I think we made pretty good

progress on the car this summer. We spent a lot more time than I would have expected running to the local hardware and auto parts stores for parts, and waiting for internet orders to arrive, but we also learned a lot about what it takes to build one of these and had a lot of fun in the process.  Here's what the car looked like at the end of the month.  

Next Month - Headers, Dashboard